
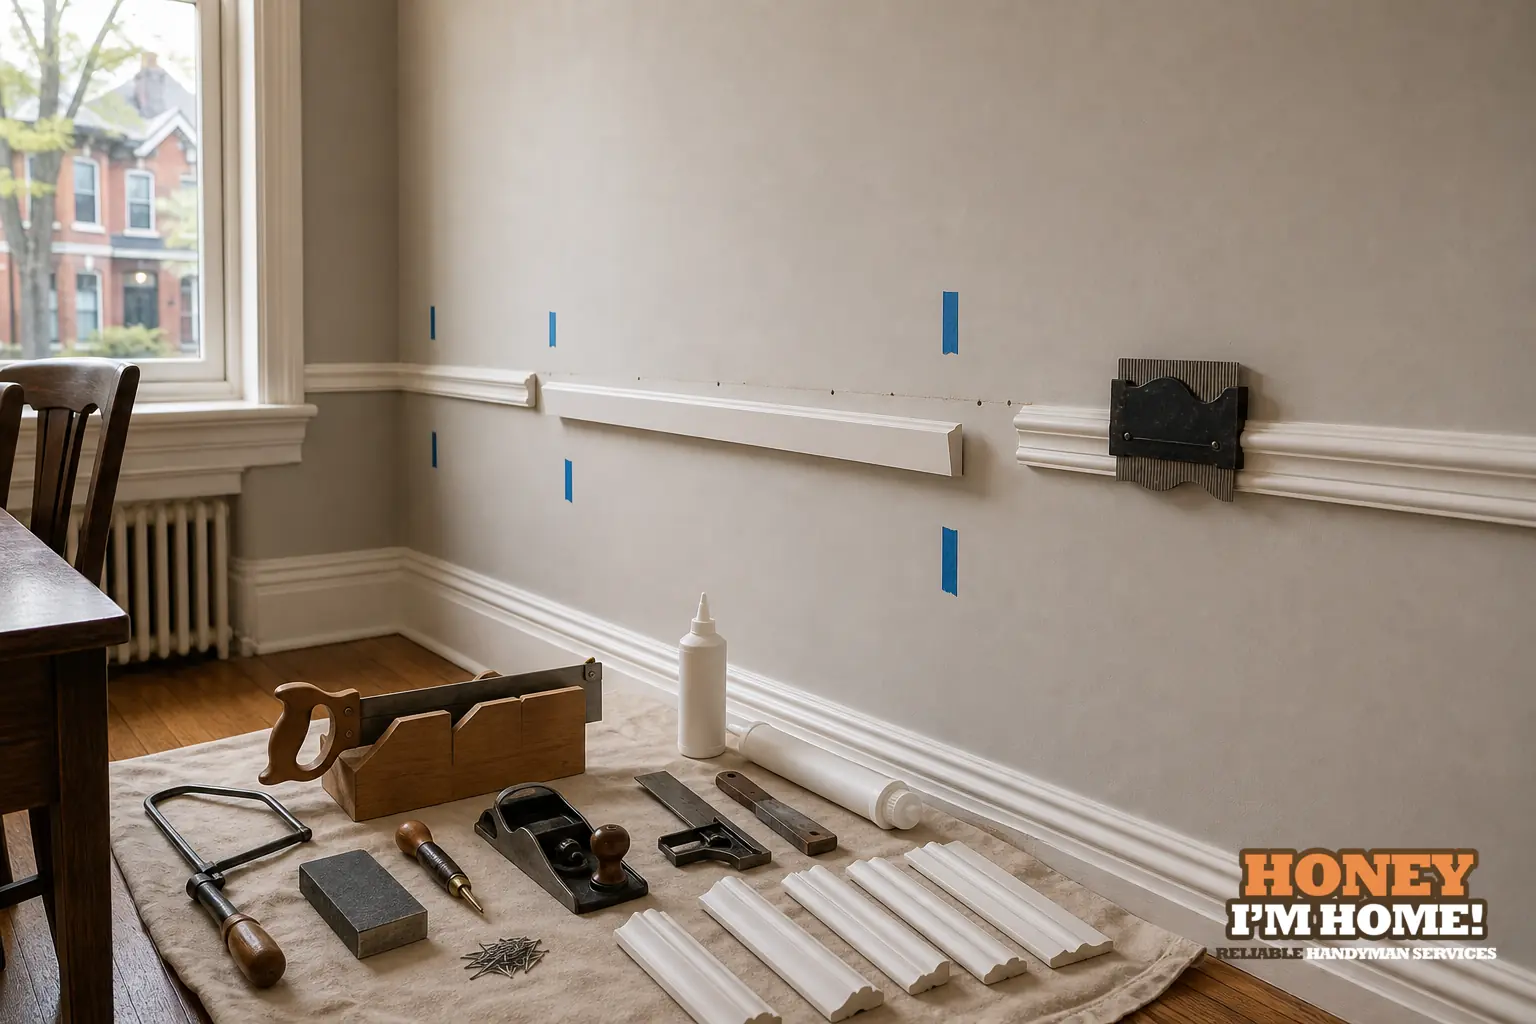
Start by revealing a small test area to confirm the original profile and the condition of the substrate, then decide whether to splice, patch or replace a full run based on how much original material remains and the number of visible transitions. Prepare blocking behind the moulding, dry‑fit pieces to check sightlines, fasten with glue plus nails, and finish so the new work matches reveal depth and sheen.
I’m Russ, an owner‑operator who works on trim and finish restoration in older Toronto homes. I plan chair‑rail repairs the same way I’d do them at home: conservative with sound original material, practical about substrate work, and focussed on sightlines rather than tricks. Below I walk through what I inspect first, how I choose a splice versus a full run, the attachment and backing steps I use, and the finish details that make a repair visually disappear. For broader trim work see Trim, Moulding & Old‑Home Finish Restoration, or to arrange a site visit use contact Russ.
First things I check on arrival
When I arrive I look for three things that decide the job: the condition of any surviving original rail, the type of wall behind it, and how the rail meets doors, casings and corners. I reveal a small section of the rail so I can read the profile and see whether paint build‑up has hidden the original shape. That reveal also tells me if the timber underneath is sound or if rot and repeated overpainting have compromised the profile.
I test the substrate in a tiny area to see whether it’s solid lath‑and‑plaster, patched plaster, or later drywall. Each substrate changes the way I fasten the rail: plaster and lath often need blocking; flaky plaster may need adhesive and longer fasteners; drywall can accept screws into blocking or anchors. I also look for paint segmentation—where old paint layers pull away—because that influences how well fillers and new paint will blend.
How I decide between splice, patch or full‑run replacement
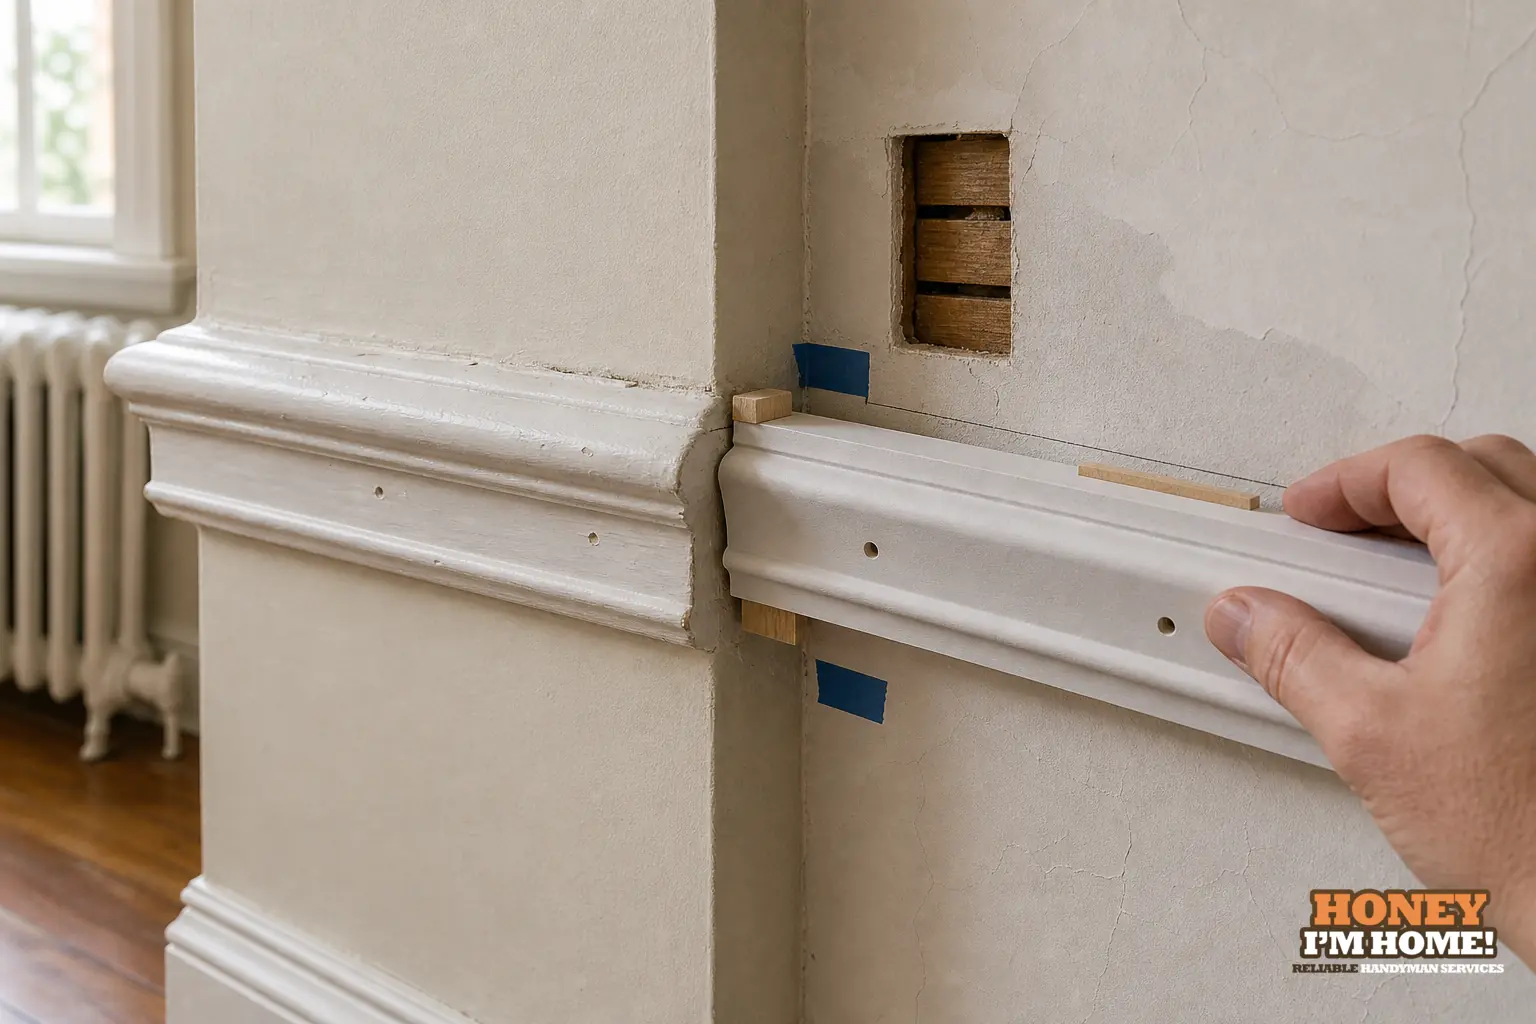
The decision is rarely about cost alone; it’s about visual outcome and longevity. If a short section is damaged but the original runs on both sides are solid, I favour a splice placed at a natural break—an inside corner, doorway or a casing return—so the join sits out of primary sightlines. Splices keep original material in place and read correctly with the room’s proportions.
If the run crosses several doors, built‑ins, or if there are multiple mismatched repairs, a matched full‑run replacement can look cleaner. I focus on matching the profile scale, step depth and shadow line rather than chasing millimetre perfection. For painted rails that rhythm is what the eye notices most; for stained rails I also match wood species and grain direction so a repaired strip doesn’t read foreign.
Preparing the substrate and attachment strategy
Older walls are seldom uniform. On many houses I work in the substrate behind chair rails is original lath and plaster with later patches, or thin drywall over the original wall. I locate studs and plan blocking before I cut any long pieces. Where the substrate is thin or brittle I fit small solid blocks behind the moulding—these become the real anchor for nails and screws and keep mitres tight as the house settles.
My fastening method uses a mix of adhesive and finish nails or screws into blocking. The adhesive keeps the rail flat against uneven plaster and eliminates chatter; nails keep the piece locked while the glue cures. I always dry‑fit entire runs and check sightlines at standing eye level. If a run crosses a door, I plan the joint so it meets the casing or makes a short eased return to the wall; that looks intentional and reduces visible end gaps.
Finish work that makes the repair disappear
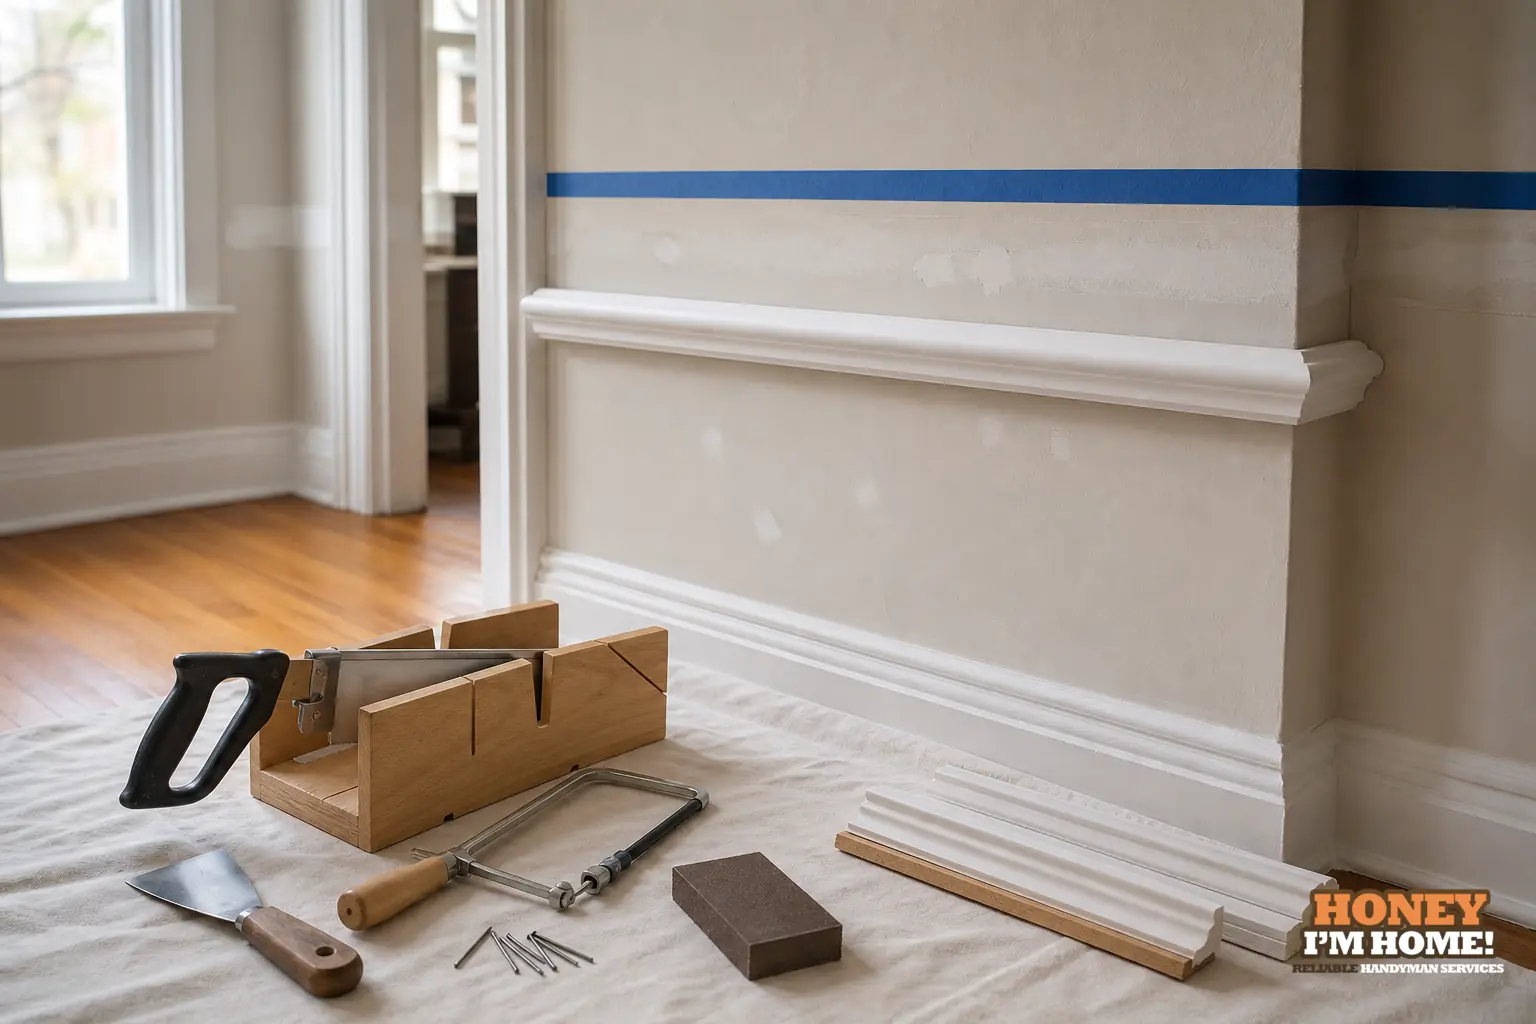
Filling and finish are where a repair either blends or stands out. I fill gaps with a finishing compound that sands smooth and takes primer; I prime any bare wood so the paint sits consistently. For painted trims I feather filler into the surrounding paint layers, match finish sheen, and stop the new paint slightly beyond the rail if the surrounding walls show wear—this prevents a fresh, narrow island of bright paint in an older finish.
For stained rails I match species when possible and keep stain coats thin until the tone and depth blend with the existing varnish. Edge treatment matters: I hand‑plane or micro‑sand the shadow edge so the new piece throws the same thin shadow as the old. Before final coats I stand back and check the run at several angles under natural and artificial light; small differences in reveal are obvious under grazing light, so I tweak them while there’s still sanding room.
Practical shop and site habits I rely on
These are the habits that save time and keep the repair tight: make a putty mould or take a small profile sample back to the shop to test router matches; always dry‑fit the run before glue; mark sightlines with a level and sighting stick rather than guessing; and protect the room with rosin paper and dust barriers. I also label each piece in sequence when I cut full runs so reassembly goes in the right order and mitres meet cleanly.
How Runnymede’s housing character changes my approach
In Runnymede I see a lot of early‑20th‑century detached houses with Edwardian and Arts and Crafts influences. The majority of dwellings were constructed before 1960. That matters to the repair in practical ways: many rails meet original plaster and connect to period casings that use modest, proportioned profiles. Because those profiles and transitions are part of the house’s character, I favour preserving original timber when it’s sound and matching the period profile rather than swapping in a wider modern rail. I also expect floor layers and door openings to control how the rail sits, so I plan joins and returns to respect those existing conditions rather than erasing them.
Common issues I warn homeowners about
Some things homeowners don’t always know: repeated overpainting can obscure profile lines and hide small rot pockets; older plaster can crumble away from the lath and needs backing; and multiple past repairs often mean hidden nail holes and patching that complicate a clean splice. I show clients the reveal and explain whether I’ll preserve, splice or replace so there are no surprises about the visible outcome.
If you want me on site I’ll walk the reveal with you, explain the tradeoffs between keeping original pieces and making a matched replacement, and run through the protection and clean‑up plan before I start. To see the full range of trim and finish services visit Trim, Moulding & Old‑Home Finish Restoration, or to book a visit use contact Russ.
How disruptive will a chair‑rail splice or replacement be?
I protect floors, tape up temporary dust barriers at doorways and cover furniture; small splices are brief jobs while full‑run replacements require more protection and tidy‑up but I keep disturbance to a minimum.
Can you match an old painted profile even if it’s heavily overpainted?
Yes, I reveal a small area to read the profile and then make a putty mould or a small shop sample to match the scale and shadow; heavy paint layers rarely prevent a believable match.
Will the new trim move or gap as the house settles?
Proper backing and fastening into solid blocking reduces future gaps; I also orient joints to natural breaks and allow for small seasonal movement where necessary.