

Porch trim usually fails where paint or seal breaks and water is allowed to sit against end grain or concealed joints. The first things I check are paint and caulking condition, gaps at mitres and butt joints, signs of trapped water behind trim, and whether flashing or downspout splash is directing runoff onto the trim. Those observations tell me whether the repair will be a local splice, full board replacement, or a profile-matched repair.
How trim actually fails: the physical mechanisms I watch for
I try to describe deterioration in plain terms on site: paint acts like a skin, but once it cracks or peels the wood beneath is exposed. End grain soaks up water quickly, mould and softening start at the cut ends, and trapped moisture at joints expands and splits paint layers. Trim pieces against masonry or stucco can stay damp from splash-back, and horizontal faces or recessed mouldings collect debris that holds moisture against the wood.
Fasteners matter. Corroded nails let pieces move and open gaps; gaps let water get behind the trim; hidden pockets of wet wood follow. I also look for flashing failures — where metal or membrane pieces should shed water but instead leave seams that pass moisture into the trim cavity. Paint failure, bad caulking, continuous contact with wet mortar or soil, and poor ventilation behind enclosed soffits are the usual chain of events I see.
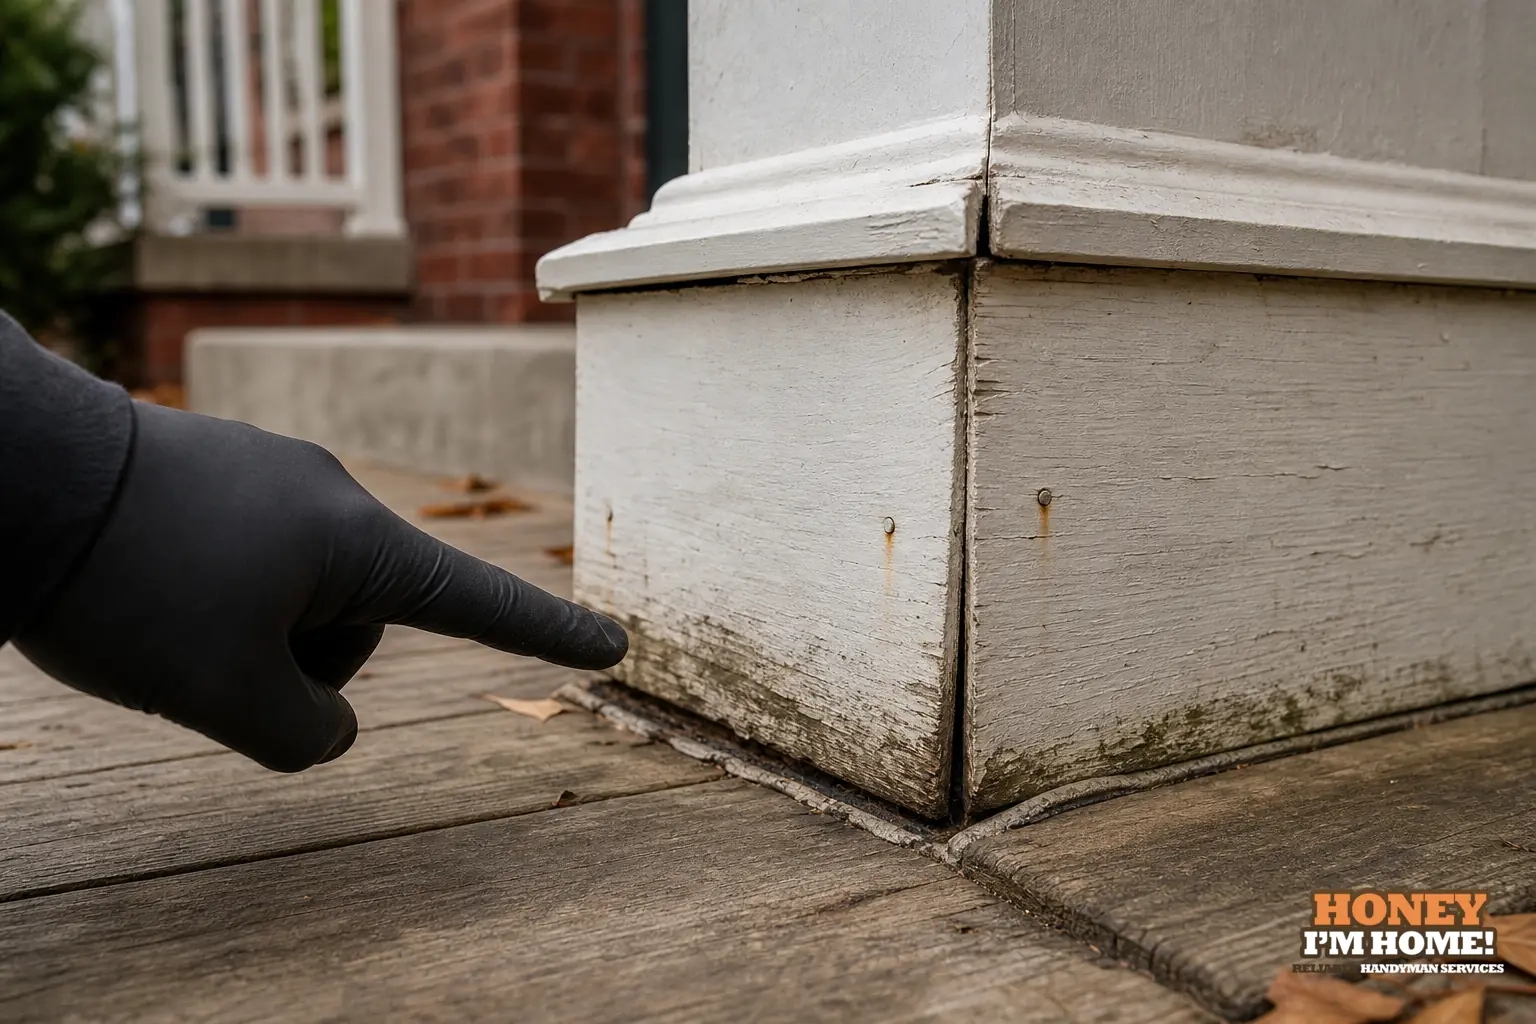
My step-by-step inspection checklist — what I do first, second and why
On arrival I do this in roughly the same order so nothing is missed. I start outside with a visual sweep for paint bubbles, peeling, discoloured streaks and splits at joint lines. Those signs tell me where moisture has been present over time.
Next I probe suspect areas with a small awl or screwdriver tip — not to demolish, but to confirm softening or rot beneath paint. I test end grain at trim ends and behind drip edges, and I open caulk lines carefully at mitres to see whether the joint is dry or wet inside. If a joint opens and I find damp wood, that area needs replacement or a splice rather than simple re-caulking.
I inspect flashings, downspouts and the grade around the porch. A downspout terminating near a step or an old splash block that funnels runoff toward the entry will be obvious on many jobs. I look for trim pieces installed directly against brick or stucco — those contact points often hide repeated wetting. Finally I check fasteners for corrosion and movement and look behind removable trim where possible to see the original sheathing condition.
How I decide between a local repair and replacing whole trim runs
My decision is based on three practical signs: whether rot is isolated to a short section, whether the visible profile and moulding match older work, and whether the cause of wetting can be corrected. If end-grain decay is limited and the surrounding wood is sound, a splice with properly pre-primed wood and painted matches the visual finish and keeps most original material. If rot appears behind a length of trim, or the profile is severely weathered, I recommend replacing the affected run so the new junctions can be flash-sealed and detailed cleanly.
I also consider preservation of original carpentry. On houses with detailed mouldings or historic door surrounds I explain the trade-off: a local patch may be less visible immediately, but profile-matched replacement preserves the overall look and eliminates hidden pockets where moisture will return. I keep finish continuity in mind and will do a test replacement sample if matching is required.

How local house character influences trim decisions
Local building character matters because it sets expectations for profile, material and repair sensitivity. In The Kingsway many houses were built before 1960 and include Arts and Crafts, Tudor Revival and Georgian influences; traditional materials such as stone, brick and stucco are common, along with crafted wood door and window frames and decorative glass. That means I don’t treat every trim detail the same: I identify original carpentry before specifying replacement, and I aim for profile matching where the piece contributes to a period finish. Profile matching and localized repair matter when new work must meet detailed period finishes; I apply sensitivity to the actual material and property rather than assuming heritage designation across the board.
Practical fixes I check or perform to prevent repeat decay
When I repair, I focus on stopping the water entry path first. That can mean reinstalling or adding narrow metal flashing behind the top edge of trim, changing the lap or reveal so water sheds away from joints, re-routing downspout discharge with an extension, or removing debris pockets that keep a moulding wet. Good overlap at horizontal transitions and back-priming the cut ends of trim are standard practice I insist on.
Caulk is a sealant, not a fix for a failing joint. I replace failed caulking and then detail the joint so it doesn’t rely on caulk alone — for example, keeping an intentional drainage gap where flashing can intercept water. I also replace corroded fasteners with stainless or properly coated screws so movement is reduced and the join remains tight under seasonal cycles.
Materials and finishes — what I inspect and how I discuss options
I identify the existing trim species and finish before I recommend a material. If the original is a dense, old-growth pine or a painted softwood with deep moulding profiles, I’ll suggest retaining or matching those profiles and using appropriately primed boards. For exposed horizontal trim or treads I point out the need for long paint life and good drip details. I avoid prescribing a material purely on price; instead I describe service differences and how each handles water exposure so you can choose with confidence.
If a trim run must be replaced to match a complex profile, I’ll commonly lay out a sample piece and show how I prime, flash and paint the junctions. That makes the final look predictable and reduces the chance of callbacks for recurring decay.
If you want a focused look at your entry’s trim and how it ties to the rest of the porch and steps, I cover this work as part of my front porch and entry repairs — see Front Porches, Steps & Entry Repairs. When you’re ready for an on-site inspection I’ll come by; you can start that conversation at /contactruss/.
How invasive is your initial inspection?
I start non-destructively with a visual sweep and light probing; removal of trim or more intrusive checks only happen if I need to confirm hidden decay.
Will you try to preserve original trim profiles?
I identify original carpentry and recommend profile-matched work when the detail is significant to the house’s character and finish.
Can small, local repairs stop the problem permanently?
Local repairs stop decay if the moisture source is corrected and the replacement is detailed and back-primed properly.