
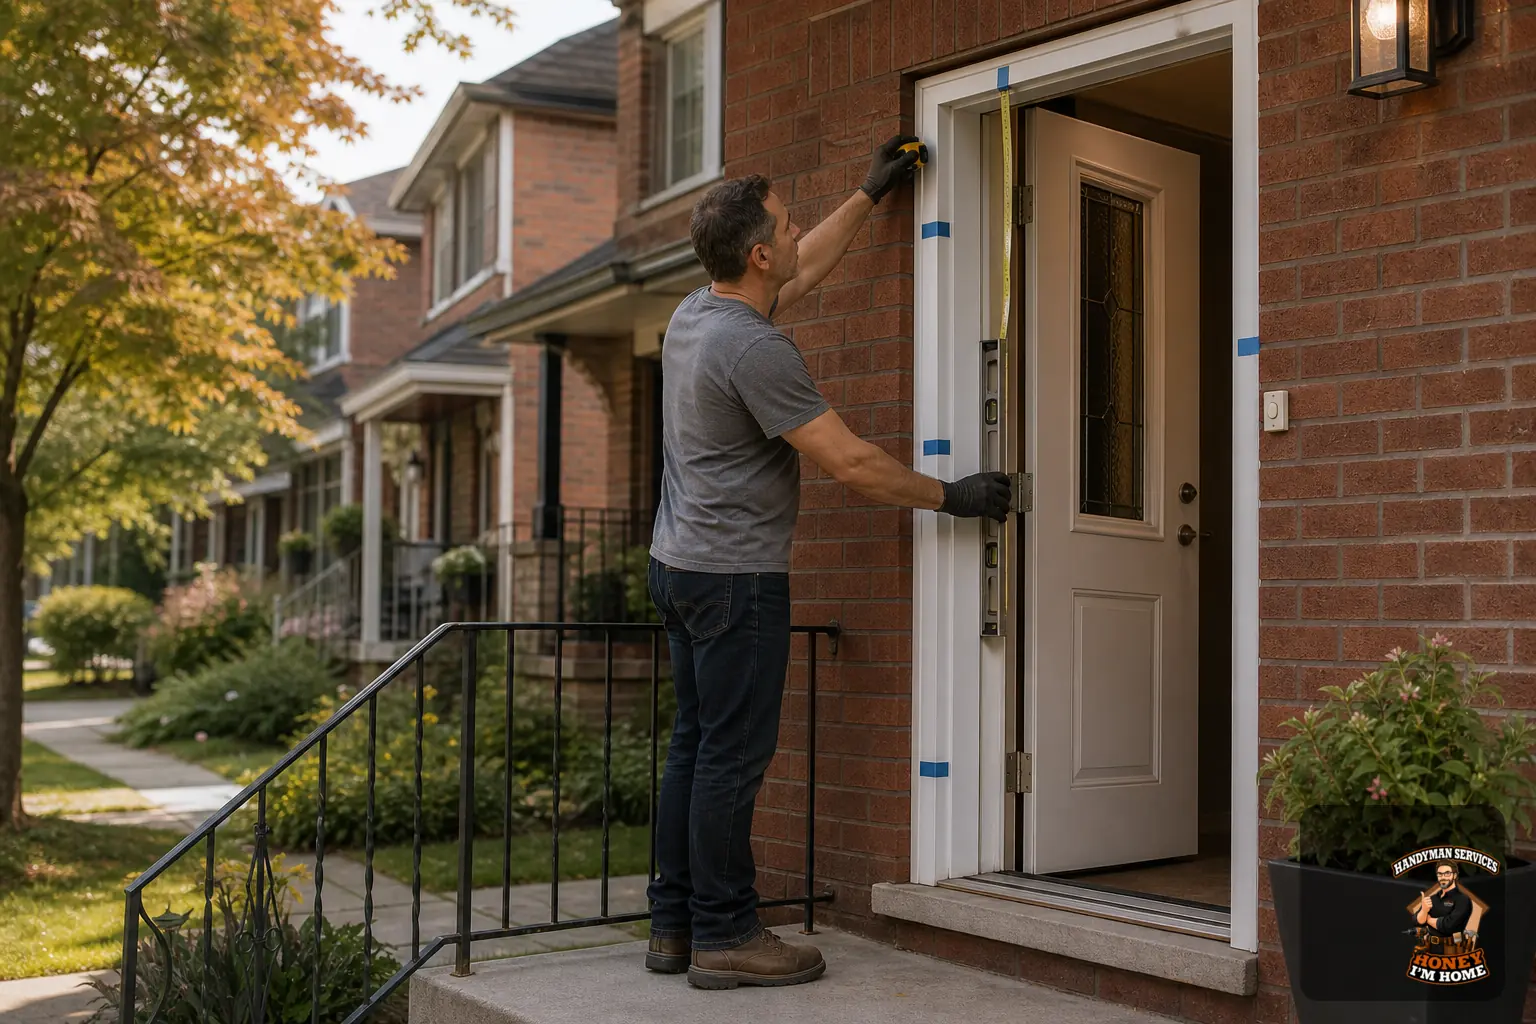
Replacing a storm door goes more smoothly when you inspect, measure and document the existing conditions first. This guide is for homeowners in Toronto, Etobicoke and Mississauga who want a clear, practical checklist to share with suppliers or an installer. It focuses on observable exterior conditions—the mounting surface, threshold and hardware clearances—and the simple measurements and photos that reduce the chance of surprises.
Why a short pre-replacement survey matters
Storm doors attach to the exterior mounting plane (brickmould, trim or surface framing) and rely on proper clearances at the head, hinge and sill. Problems discovered after installation usually come from mismatched clearances, insufficient headroom for the closer arm or a damaged mounting surface. A brief survey helps you decide whether you can order a like-for-like replacement, whether you should request a reversible model, or whether a mounting-surface repair is needed first.
Simple visual checks before measuring
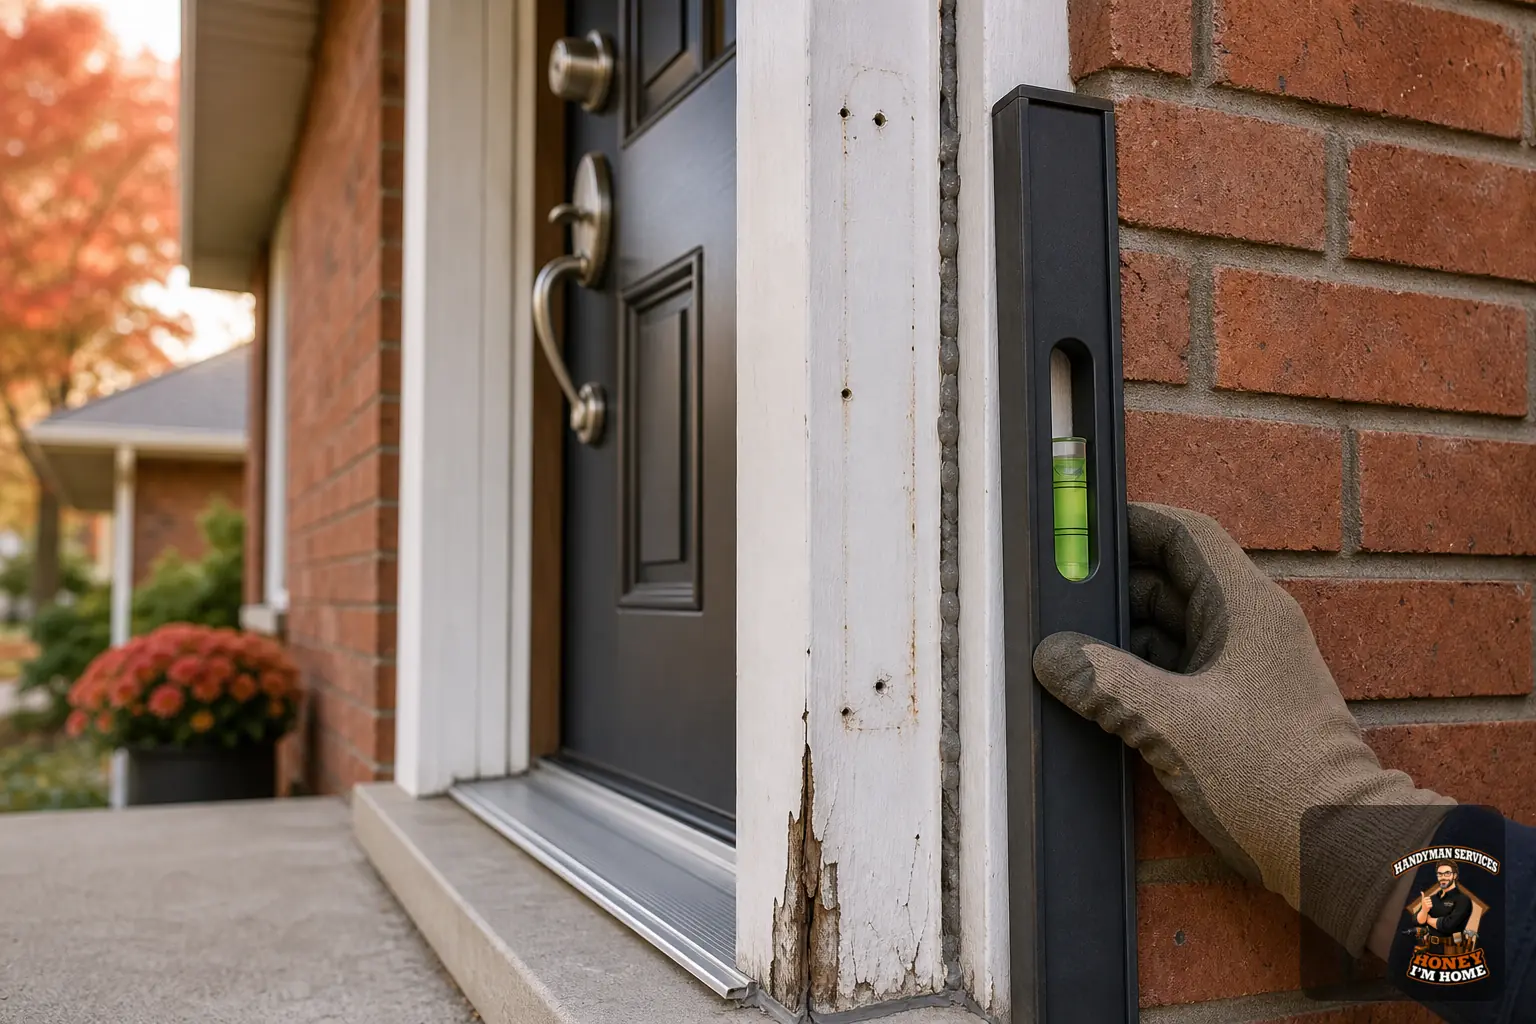
First do a visual walkthrough of the door and the exterior mounting plane. You do not need to remove hardware for this step. Look for:
- Mounting surface material and condition: Note whether the trim is wood, painted wood, composite or metal, and look for soft spots, rot, rust or loose trim where the Z‑bar or surface frame will fasten.
- Reveal and adjacent finishes: Observe how the mounting plane sits relative to siding, brick or cladding. Is there a step, offset or projecting trim that could interfere with the storm door frame?
- Threshold and sill: Check the sill nose projection, slope toward the exterior and whether the sill is covered by a metal cap or decorative piece. Note any areas where water damage or unevenness is present.
- Hardware interference: Confirm that the storm door’s handle, latch and closer will not collide with the primary door handle, decorative trim or nearby fixtures when both are in normal positions.
- Obstructions: Identify downspouts, porch lights, house numbers, doorbells, railings or planters that project into the hinge or strike side and could affect installation.
Tools to have on hand
Keep this survey simple. Useful items include:
- A tape measure (3 m / 10 ft minimum)
- A 24" level or straightedge
- A flashlight or your phone’s light
- A smartphone or camera to photograph details
- A notebook or phone notes app to record measurements and observations
How to measure the exterior mounting plane
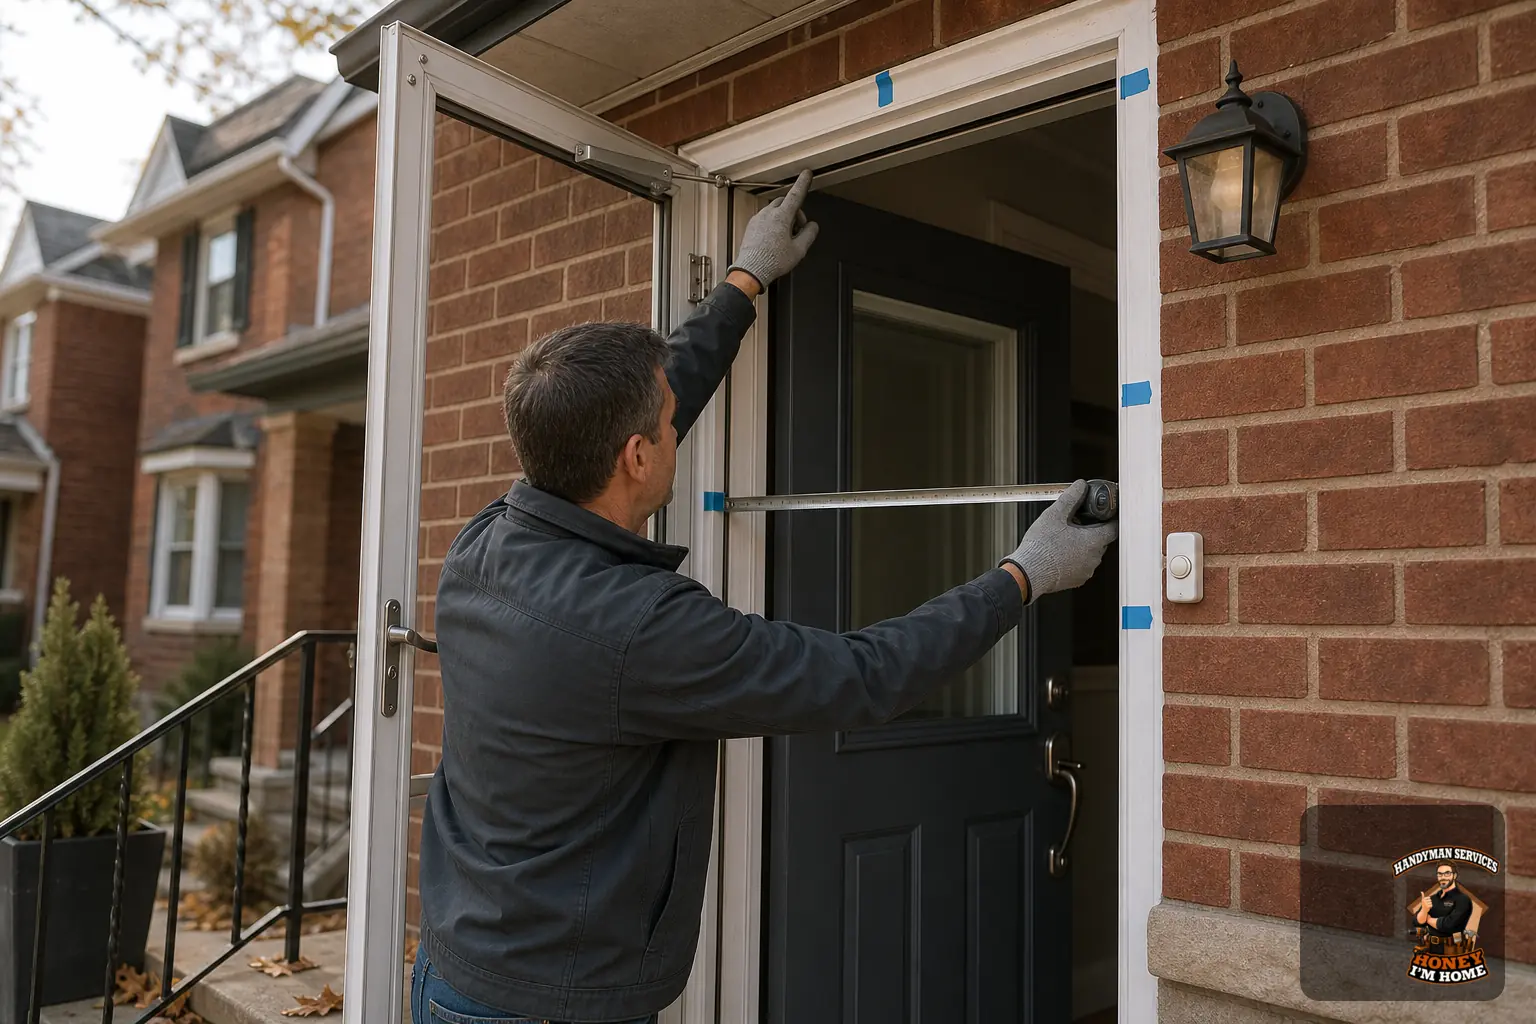
Storm doors are usually mounted to a Z‑bar or a surface frame fixed to the exterior trim. Measure at the exterior mounting plane (the surface the Z‑bar will attach to) and record the smallest reading where measurements vary.
- Width: Measure the clear width between the inside faces of the brickmould or mounting trim at the top, middle and bottom. Record all three and use the smallest value when sharing measurements.
- Height: Measure from the forward edge of the sill (sill nose) up to the underside of the head brickmould or mounting trim; take this at several points across the opening and note the smallest reading.
- Reveal depth to adjacent finishes: Measure how far the mounting plane projects relative to adjacent siding or brick. This affects frame clearance and whether the door will sit flush or catch on trim.
- Headroom for closer bracket: Measure vertical clearance above the mounting plane to any overhead soffit, archway or projecting trim where a closer bracket or arm would be installed. Different closers need different clearance for the arm and bracket, so record the shortest available vertical space.
- Diagonal (out‑of‑square) check: Measure corner-to-corner diagonals on the exterior mounting plane. If the diagonals differ noticeably, note the opening is out of square; installers commonly correct small amounts with Z‑bar placement and shims.
Tip: Photograph the tape measure in place for each measurement so suppliers see exactly where you measured.
Threshold and bottom sweep details
Storm doors seal at the bottom with a sweep or bottom expander that typically allows some on-site adjustment. Record:
- Sill nose projection — how far the sill extends past the mounting plane.
- Whether the sill slopes toward the exterior and whether any part of the sill is damaged or uneven across its width.
- Any capped or decorative sill covers that change clearance for a bottom expander.
If the sill is badly deteriorated, plan to repair it before installing a new storm door. For minor unevenness, installers often use the door’s bottom expander and precise placement of the Z‑bar to achieve a good seal without altering the threshold.
Hardware, latch clearance and hinge hand
Storm door hardware is independent from the primary door lock. Before ordering, verify:
- The storm door handle, closer arm and latch will not physically contact the primary door handle or trim when both are closed.
- The strike area on the storm door frame can accept the latch without rubbing the primary door hardware.
- Handle projection: measure how far the primary door handle and deadbolt project from the door face to confirm clearance with the storm door hardware layout.
To record hinge side (hand), stand outside facing the entrance. If the hinges are on your left it’s left-hand; if they’re on your right it’s right-hand. Photograph the hinge side and include it with your measurement photos. Many storm doors are reversible (left/right swing can be changed on some models), but suppliers and installers still require the hinge side as ordered, so always confirm the hand from the exterior when placing an order.
Glass, screen and aluminum panel notes
Tempered glass is commonly fitted in storm doors for safety. If you prefer insulated glazing, decorative panes or a screen-only option, confirm the specific model supports those choices. Photograph the existing glazing and how it’s secured; that helps suppliers match options and mounting details. Note that storm door slabs are often aluminium; major slab modifications on site are typically limited to manufacturer‑allowed bottom adjustments and should be confirmed before any alteration.
What installers commonly adjust on-site
When an opening isn’t perfect, installers usually rely on a few standard adjustments rather than heavy modification of the door slab:
- Z‑bar/frame placement and shimming: Adjusting the frame and using shims at the exterior mounting surface to square the opening and control reveals.
- Bottom expander/sweep adjustment: Fine-tuning the bottom seal to match sill projection and avoid scraping while maintaining a weather seal.
- Strike and latch adjustments: Small relocations or swap of strike plates to ensure the latch engages cleanly and clears the primary door hardware.
These are normal steps installers use to get a good fit. If you see significant damage to the mounting surface or a severely uneven sill, repair first and then install the storm door for best long-term performance.
Documenting what to share with suppliers or an installer
Compile a short file with measurements and photos to speed up quoting and reduce misunderstandings. Include:
- Top, middle and bottom width measurements at the exterior mounting plane.
- Height measurements from sill nose to the underside of the head mounting trim at several points.
- Photos of the mounting surface, sill across its width, and the head area showing available headroom for a closer bracket or arm.
- Material and condition notes for brickmould or mounting trim and any soft or corroded areas.
- Reveal depth to adjacent siding/brick, and any obstructions on hinge or strike sides (downspouts, lights, doorbells, etc.).
- Hinge hand recorded from the exterior and photos of the existing hardware and handle projection.
When you share concise photos plus the three width and several height measurements, a supplier or installer can usually advise whether a like-for-like replacement is suitable or whether a different model or repair is needed.
When to request a professional on-site review
Ask for a professional assessment if you find substantial rot, a badly uneven sill, damaged trim where the Z‑bar will attach, or significant out-of-square conditions. A qualified installer can confirm which adjustments are appropriate and whether mounting-surface repair should come first. For more information about professional options see the Door & Window Installation parent page at /services/door-and-window-installation/. When you’re ready for a quote or an on-site assessment, reach out through /contactruss/.
Quick printable checklist
- Photos: mounting surface, hinge side, head area and full sill.
- Width: top / middle / bottom at the exterior mounting plane.
- Height: several points from sill nose to underside of head mounting trim.
- Reveal depth to adjacent finishes; headroom above mounting plane for closer bracket/arm.
- Hinge hand recorded from the exterior and handle projection.
- Sill nose projection, slope and any visible damage.
- List of obstructions on hinge and strike sides.
FAQ: Are many storm doors reversible if I need the swing changed?
Many models are reversible, but not all. Even when a door is reversible, suppliers and installers still ask for the hinge side as seen from the exterior so they can prepare the correct hardware and frame. Photograph the hinge side and include it with measurements to avoid ordering the wrong swing.
FAQ: What exactly is "headroom for the closer bracket"?
This refers to the vertical clearance above the mounting plane to any overhead soffit, archway or projecting trim where the closer bracket or arm would sit. Measure the shortest distance from the mounting surface up to that overhead plane so you can confirm a chosen closer has sufficient room to operate without hitting trim.
FAQ: When should I get an on-site professional review?
Request a pro visit if you find significant rot or soft trim where the Z‑bar will fasten, a badly uneven or deteriorated sill, or large out‑of‑square conditions. A professional can confirm whether the opening can be adapted with frame placement and shimming or whether repairs should be done first.
Doing these checks and keeping a simple folder of photos and measurements will make ordering and installation more predictable. When you want a professional assessment or a quote, see the Door & Window Installation parent page at /services/door-and-window-installation/ and contact us via /contactruss/.