
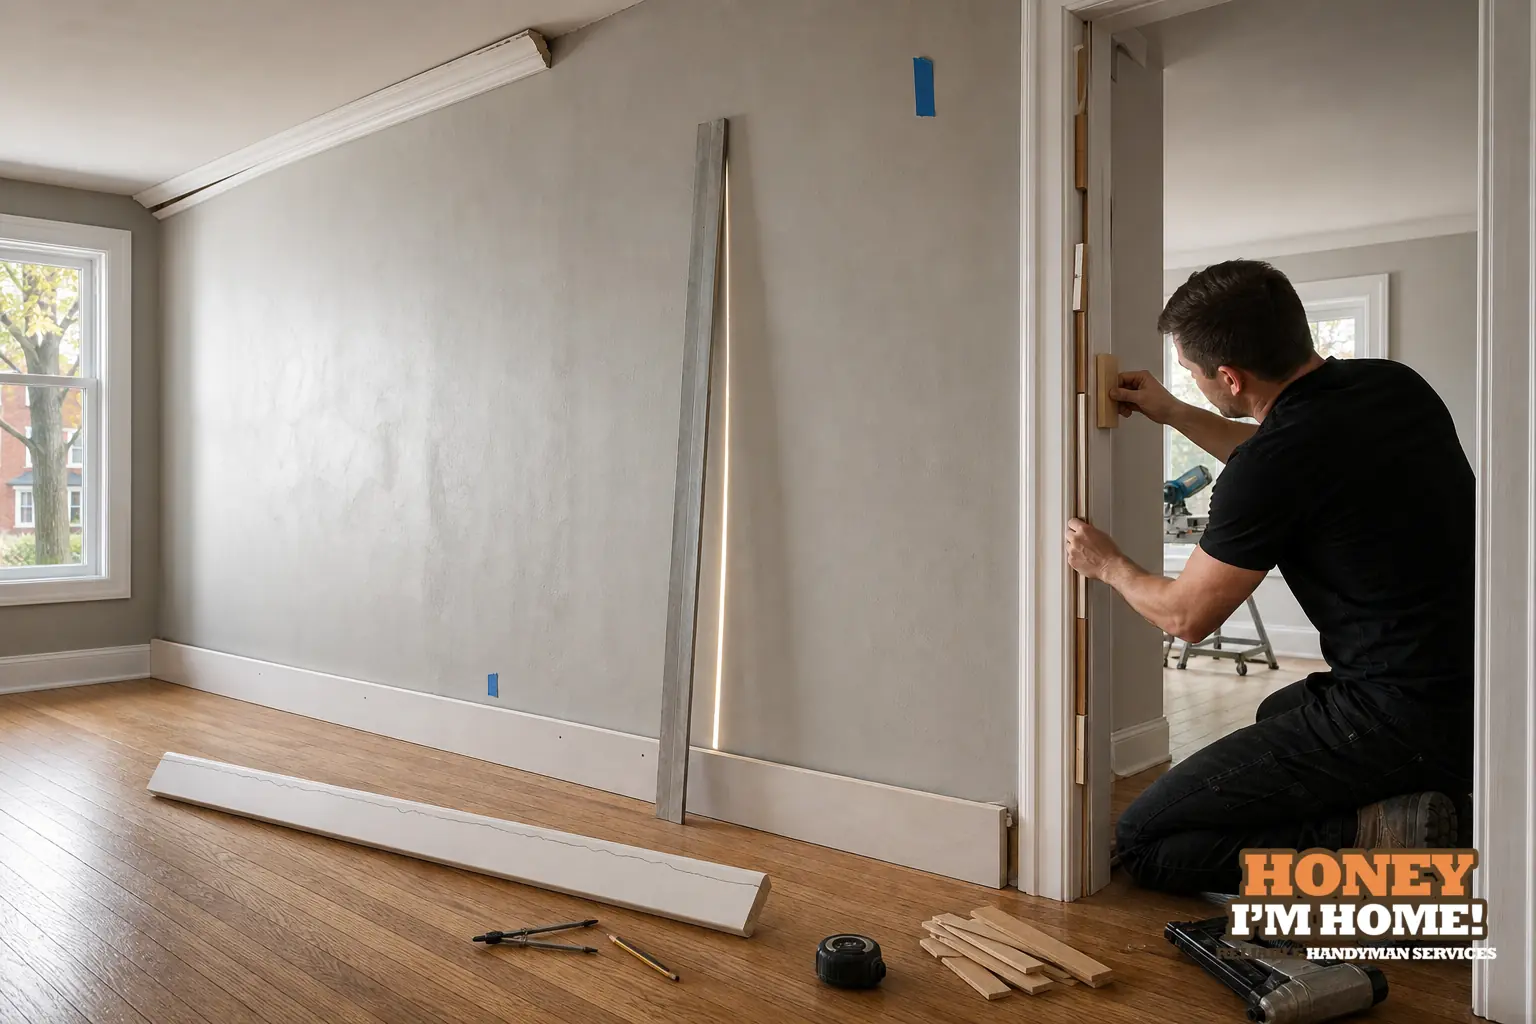
Uneven walls change how trim meets the surface and how joints read under light. I look for bows, out-of-plumb faces and patchy plaster first, then choose scribing, shimming or a controlled reveal so baseboards, casings and crown sit flat, fasten to solid backing, and look intentional rather than patched.
I’m Russ, owner-operator at Honey, I am home. I focus on older west‑end houses where original trim, plaster and layered finishes are common, and I speak plainly: the wall behind a piece of trim defines the carpentry choices I make. A straight board mounted to an uneven wall will show gaps, kick out, or force cosmetic fixes that read like bandages.
What I check on arrival
Before I choose profiles or buy stock lengths I run three quick inspections: sight the run of the wall for visual highs and lows, check the plane with a long straightedge or level to find bows and bulges, and inspect reveals at doors and windows to see how old trim and layers meet the substrate. I also look for solid backing where fasteners will hold; that determines whether shimming is practical or whether trim needs to be fixed to studs.
Those observations tell me whether I’ll scribe to the wall, shim the trim back to a straight face, or use a reveal strategy so irregularity becomes a deliberate line. I measure existing moulding profiles and transitions rather than assuming modern dimensions will fit; that keeps new work proportional to what’s already there.
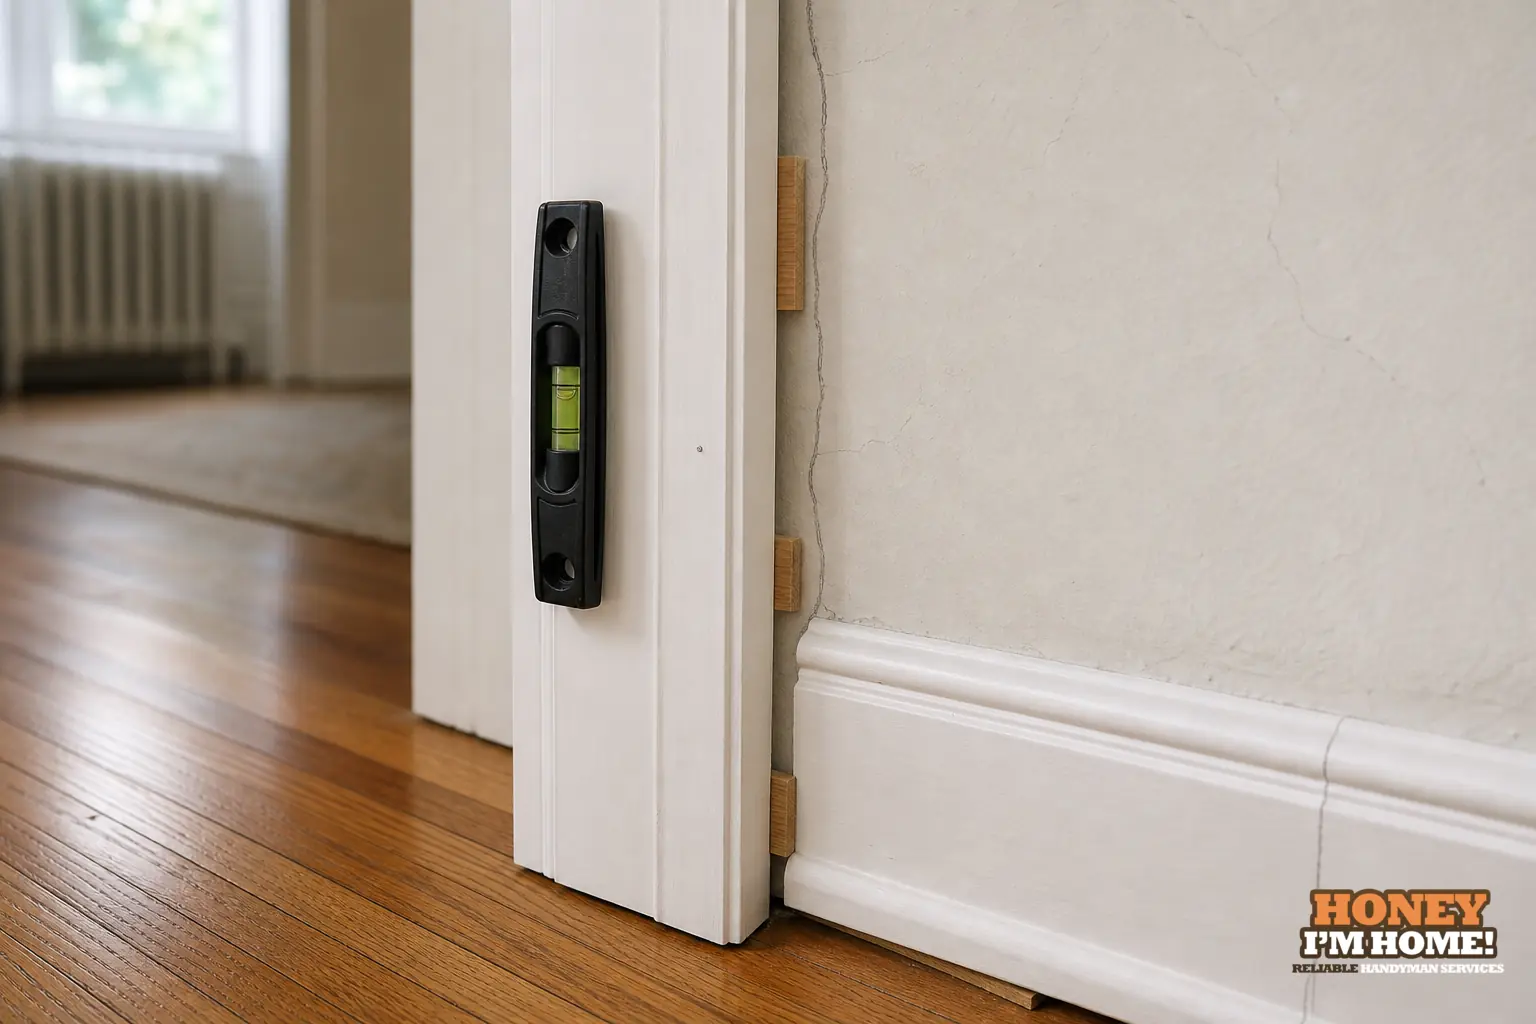
Common wall conditions and the trade decision each forces
Different wall problems push me toward different fixes. Thinking in terms of the problem helps you spot what matters when you’re planning trim.
- Bowed or wavy sections: When a wall bows at midspan I avoid forcing a wide board into place; instead I scribe or use shims at studs so the visible face reads flat without over‑stressing the material.
- Out-of-plumb walls: A leaning wall changes corner gaps along a run. I either plane the mating piece to follow the fall or set a consistent reveal so the lean becomes a controlled design choice rather than a random gap.
- Irregular plaster or layered surfaces: Old plaster patched over time can be uneven. Scribing and smaller shim stacks work better than thick filler because they maintain a crisp profile and reduce visible cracking later.
- Mismatch at thresholds and windows: Where door frames or window jambs moved in past jobs I measure reveals and match new casing to those transitions so the room reads coherent.
Those choices affect joints, returns and whether I cope or mitre inside corners. For inside corners on uneven walls I often cope because it follows the profile of the moulding and survives small changes in wall plane better than mitres that rely on perfect angles.
Practical techniques I use and why they matter
I keep a small set of repeatable moves that handle most uneven-wall situations. Each has a reason beyond just hiding a gap.
- Scribing: I press the trim to the wall, run a scriber or compass along the irregular surface, transfer that line and cut the trim to match. It produces continuous contact and looks like intended joinery rather than a patched edge.
- Shimming behind the trim: I place thin shims at solid backing points and fasten through the trim into backing so the face plane is consistent. Proper shims are hidden at studs and keep nails from pulling out as the house moves.
- Controlled reveals: Where small gaps would be obvious I intentionally leave a narrow reveal and finish it with paintable caulk/sealant. A consistent reveal reads like design, not a repair.
- Coping inside corners: Coping fits the profile to the mating piece and tolerates small changes in wall plane better than mitres on uneven walls.
- Back‑beading and returns on wide profiles: For wide baseboards or crown I use back beads or small returns that take up irregularities without leaving large visible gaps.
I avoid relying on heavy surface fillers as a primary fix. When a joint is tight by design, small caulk joints and feathered wood filler finish cleanly; when a joint is forced tight on an uneven wall it tends to fail or reappear as the house settles.
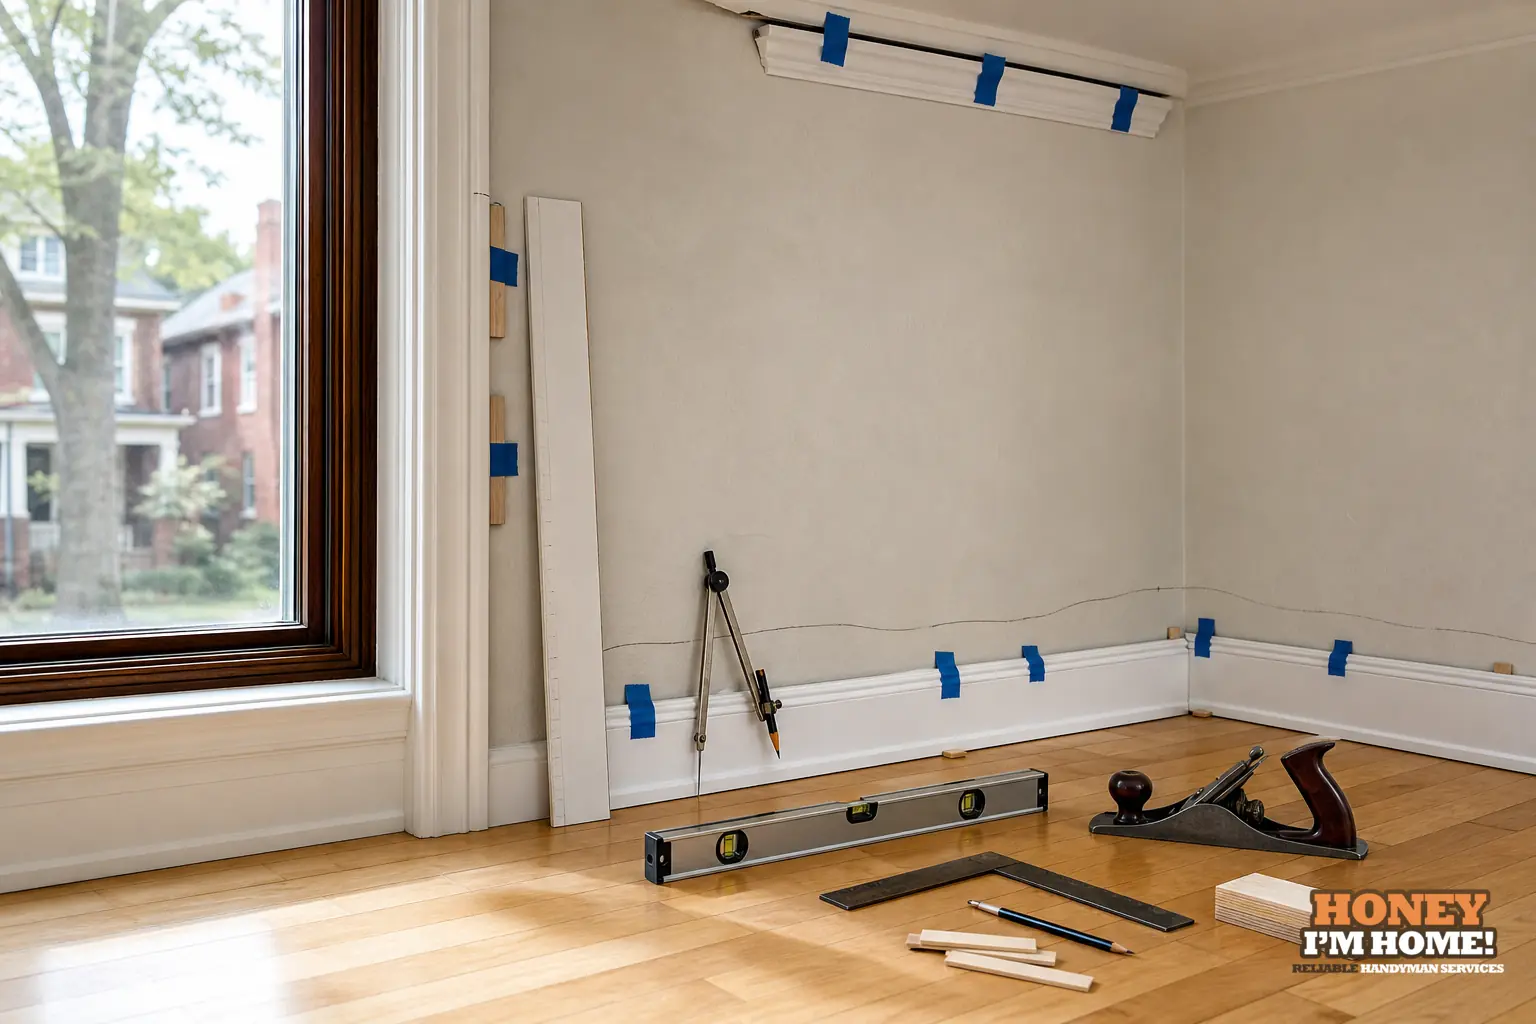
How houses in Runnymede-Bloor West Village shape those choices
In Runnymede-Bloor West Village the housing stock is dominated by early‑20th‑century detached houses with Edwardian and Arts and Crafts influences, and the City reported most dwellings there were built before 1960. That pattern matters in practice: original plaster, layered trim profiles and historic door and window proportions are common features, and they change how I repair and install trim.
For example, where an original casing profile sits alongside a newer stock moulding I’ll measure and, when appropriate, match the profile so the room retains its period proportions. Where plaster shows patched sections I prefer scribing and thinner shim stacks so the trim meets the wall cleanly without disturbing brittle plaster edges. Those decisions respect useful original material when it’s still sound while delivering a neat finished line.
A short vignette from the portfolio
Our homepage portfolio shows a staircase refinished in dark stain with white spindles, plus custom interior woodwork. When I refinish or replace one visible element like a stair or new casing, the adjacent trim and wall plane need the same attention; a fresh stain or new casing will highlight uneven joins if the wall plane hasn’t been accounted for, so I always check surrounding walls and transitions before I begin.
Finishing details that read as craft, not patchwork
After a trim run is fastened I take three finishing steps that change how the work reads in real rooms. I seal narrow gaps with paintable caulk/sealant applied sparingly; I feather wood filler at exposed edges so moulding profiles stay crisp; and I inspect joints under direct light to decide whether a reveal or a tight butt looks better in the room’s lighting. For stained work I check shadow lines at different times of day so the finish reads consistent across the run.
Fastening matters too: I aim to hit solid backing where possible and avoid relying solely on face nailing in unsupported cavities, because those nails will loosen as houses settle or as humidity changes.
When you should ask me to take a look
If you’re picking new profiles or ordering trim, have someone inspect the walls first. I’ll check wall runs, existing trim condition and reveal relationships with doors and windows. From there I’ll outline practical options: match and repair original profiles, use a consistent reveal to simplify transitions, or replace substrate selectively where it’s unsound. If you want to discuss specifics, see Custom Carpentry & Interior Finishing or reach out via /contactruss/ to set up a look.
One Google reviewer put it plainly: "This is a person whose number is worth saving." See the review.
Can you fit new trim without damaging old plaster?
Yes. I use scribing, careful shim placement and delicate fastening to protect brittle plaster edges and avoid heavy cutting into the wall surface.
Will you match the original moulding profile or simplify it?
I measure existing profiles and discuss whether matching the original or choosing a simplified profile better preserves the room’s period character.
How do you stop joints from opening as the house settles?
I fasten into solid backing, use shims at studs, and favour reveal strategies that accommodate small seasonal movement without visible splitting.